In addition, vehicles with stop/start systems typically need configuring with a tool like the Century YuFit, to alert the vehicle that a new battery has been fitted, and to reset the vehicles charging system strategy. So if you are in doubt with any of the above issues, we would recommend consulting with your nearest battery retailer.
With that being said, let’s do a battery change.
- To begin with, make sure you take off any jewellery on your hands or around your neck, and wearing gloves is also a good idea. Make sure the ignition system is turned off, and the key removed from the vehicle. Proximity sensing keys should be at least 2-metres clear. If you wish to use a memory minder to retain your vehicle’s clock, stereo or navigation settings, now is the time to plug that in.
- Before you remove the old battery, take note of the location of the positive terminal and ensure it is the same on your new battery. It’s also a great idea to position your new battery in the correct orientation, so it is ready to lift straight into the vehicle.
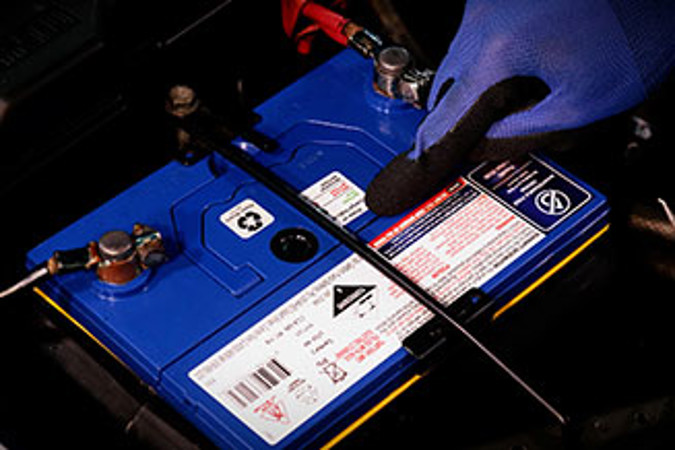
- First, remove the negative terminal followed by the positive terminal. Removing in this order reduces the risk of accidentally grounding tools.
- Next, we can undo the bolt for the hold down bracket, and carefully remove the battery from the vehicle.
Before we install the new battery, inspect the tray area and clean the area if necessary. Any corroded areas of metal should be cleaned, dried and painted with acid proof paint, and the terminals should be cleaned and brushed if needed.
- Place the new battery into the tray, ensuring it is installed in the correct orientation.
- Reinstall the hold-down bracket, and it’s important to remember this should not be overtightened or it can damage the battery. Simply tighten it until you begin to encounter resistance, and then give it two additional turns. This bracket only need to be tight enough to prevent the battery from moving – it isn’t a test of your strength!
- Next you can apply a thin coating of high temperature grease to the posts and terminal connections.
- Replace the terminals, ensuring the positive terminal is installed first, followed by the negative. Make sure they are sitting down as low as possible over the battery post, and then tighten them up until they do not move.
- Make sure you never hammer the terminals onto the battery post, as this can damage the posts and the battery casing itself.
And that’s all there is to it. Lead-acid batteries have a lifespan of 42 months or around 3.5 years on average, so another great idea is to get a paint pen and write the installation date on the battery itself to serve as a reminder of when you should get it checked in the future.